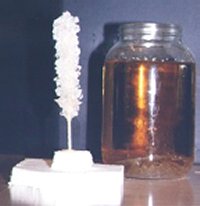
 Crystals are formed when atoms line up in patterns and solidify. There are crystals everywhere — in the form of salt, sugar, sand, diamonds, quartz, and many more!
To make crystals, you need to make a very special kind of solution called a supersaturated solid solution. Here’s what that means: if you add salt by the spoonful to a cup of water, you’ll reach a point where the salt doesn’t disappear (dissolve) anymore and forms a lump at the bottom of the glass.
The point at which it begins to form a lump is just past the point of saturation. If you heat up the saltwater, the lump disappears. You can now add more and more salt, until it can’t take any more (you’ll see another lump starting to form at the bottom). This is now a supersaturated solid solution. Mix in a bit of water to make the lump disappear. Your solution is ready for making crystals. But how?
Here’s what you need:
- pencil or wooden skewer
- string
- glass jar (cleaned out pickle, jam or may jars work great)
- 8 cups of sugar
- 3 cups water
- paper clip
- adult help and a stove
- food coloring is optional but fun!
If you add something for the crystals to cling to, like a rock or a stick, crystals can grow. If you “seed” the object (coat it with the stuff you formed the solution with, such as salt or sugar), they will start forming faster. If you have too much salt (or other solid) mixed in, your solution will crystallize all at the same time and you’ll get a huge rock that you can’t pull out of the jar. If you have too little salt, then you’ll wait forever for crystals to grow. Finding the right amount takes time and patience.
1. Gather all your materials out and have everything ready so you can start.
2. Tie one end of the string to the pencil and the opposite end to the paper clip. (You can alternatively use a skewer instead of a piece of string to make it look more like the picture above, but you’ll need to figure out a way to suspend the skewer in the jar without touching the sides or bottom of the jar.)
3. Wet the string a bit and roll it in some sugar. This will help give the sugar crystals a place to start.
4. Place the pencil across the top of the jar. Make sure the clip is at the bottom of the jar and that the string hangs straight down into the jar. Try not to let the sting touch the side of the jar.
5. Heat 3 cups of water to a boil
6. Dissolve 8 cups of sugar in the boiling water (again be careful!). Stir as you add. You should be able to get all the sugar to dissolve. You can add more sugar until you start to see undissolved bits at the bottom of the pan. If this happens, just add a bit of water until they disappear.
7. Feel free to add some food coloring to the water.
8. Pour the sugar water into the jar. Put the whole thing aside in a quiet place for 2 days to a week. You may want to cover the jar with a paper towel to keep dust from getting in.
You should see crystals start to grow in about 2 days. They should get bigger and bigger over the few days. Once you’re happy with how big your crystals get, you can eat them! It’s nothing but sugar! (Be sure to brush your teeth!) This one (left) us about 6 months old.
There you go! Next time you hold a pencil, throw a ball, or put on a shoe try to keep in mind that what you’re doing is using an object that is made of tiny strange atoms all held tightly together by their bonds.
